Support for

If your design is to be custom-sized, you will need to use the next-largest product, and specify extra cuts using Finishing Notes (example below):
Need a product to be trimmed down to 90 x 148mm?
Order an A6 (105 x 148mm) product and apply extra cuts.
If the product you are ordering is going through the die-cutting process (which includes shaped, creased, perforated or cut-out Cards and Showcards/Thick Flyers and Laser Mailers), you should specify die-cut lines rather than extra cuts on the guillotine.
Provided that your design stays within the appropriate limit for anchor points, these are included in the cost.

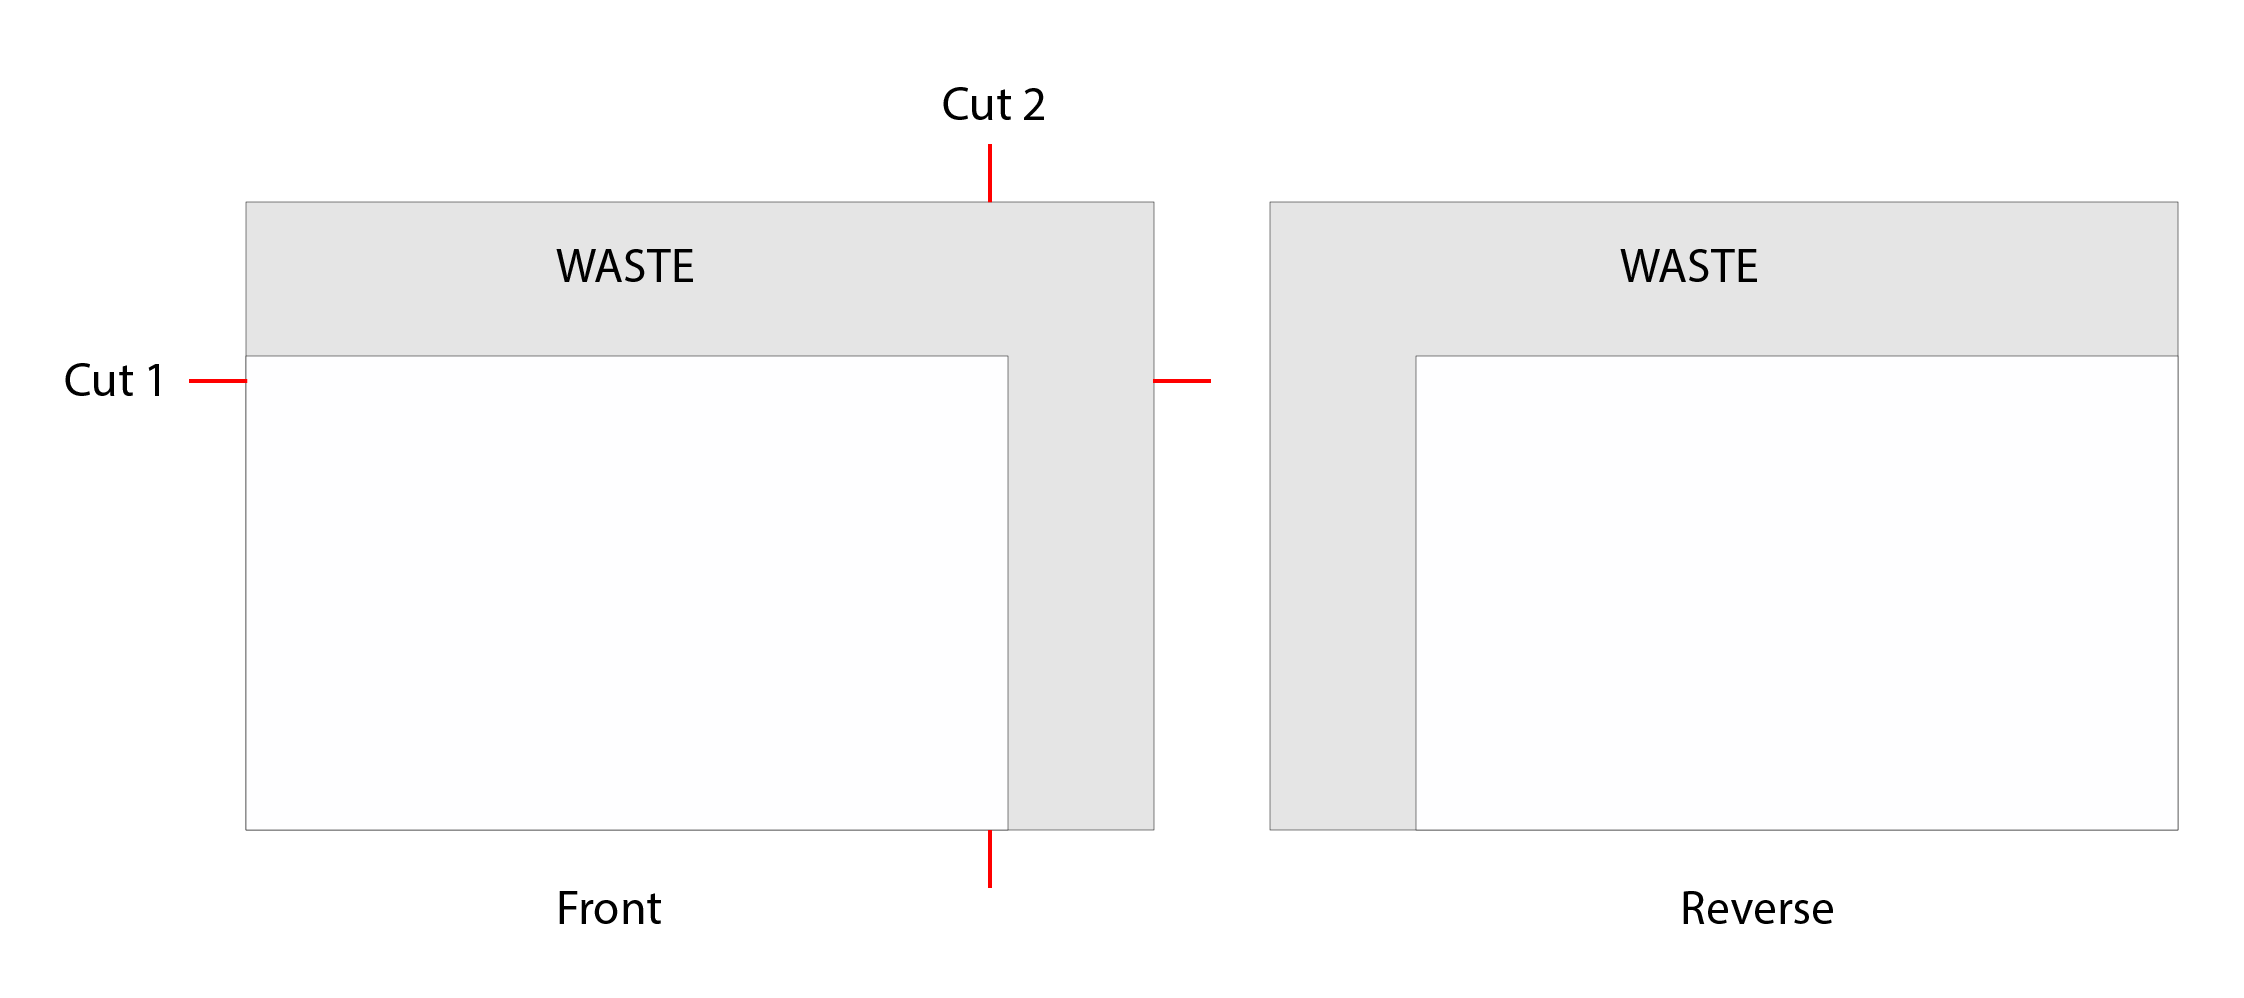
In the example below we'll trim 1.5 mm off all 4 edges, then 1.5mm beneath the WASTE box.
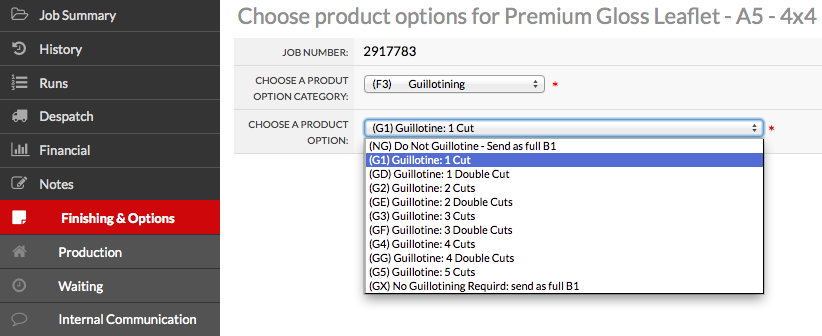
Your will specify which standard product will contain the artwork and is where you specify the size of the finished product.
In addition to selecting your desired extra guillotine cuts, you must also specify the final size of your job after the cuts have been applied.
Once you've selected your extra cut(s), you can add this information from Workgroup > Jobs > View/Amend > Notes > Finishing & options > Add Memo and manually entering the final size in the area e.g. 'Finished size is 90 x 148mm'.
If you do not include this information before sending to print, your job will be left to interpretation by Production and may not be trimmed to size and/or set to status 094.
The smallest finished size we will produce is 70 mm × 45 mm as we can't automatically trim and pack anything smaller.
The smallest square that we can produce is 65mm x 65mm.
These sizes take into account the capability of our heavy-duty guillotines to continue cutting effectively within our batch production processes.
If a customer requires a smaller product, we can only supply the standard size and any further guillotining will have to be done by a Finishing House (organised by you, locally or otherwise) with more suitable equipment.
The specification for waste on Cut-out Cards is slightly different.
The reverse must be a mirror image of the front, and the waste area labelled.
Your artwork should bleed beyond the cut line by 1.5 mm and remember to leave a 4 mm Quiet Zone.
 |
| (This example needs two additional guillotine cuts) |