If you are printing partial coverage, with clear unprinted areas then you will usually need to add a White_ink layer to print behind any printed areas.
If you do not add this, the printed areas will appear lighter and slightly transparent a bit like a stained glass window.
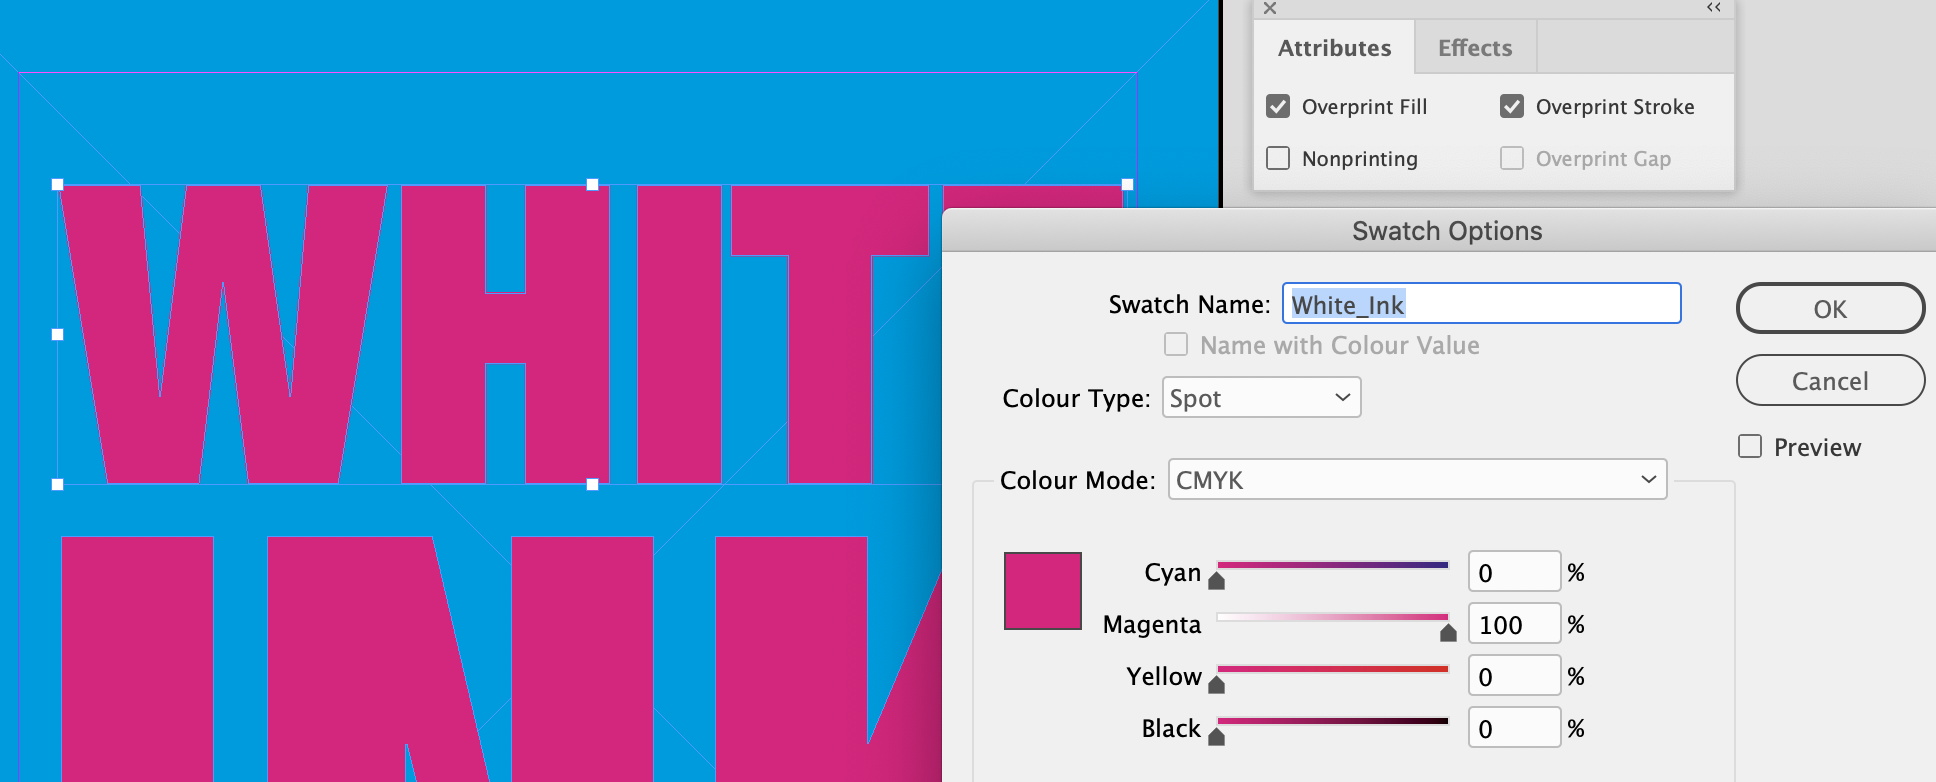
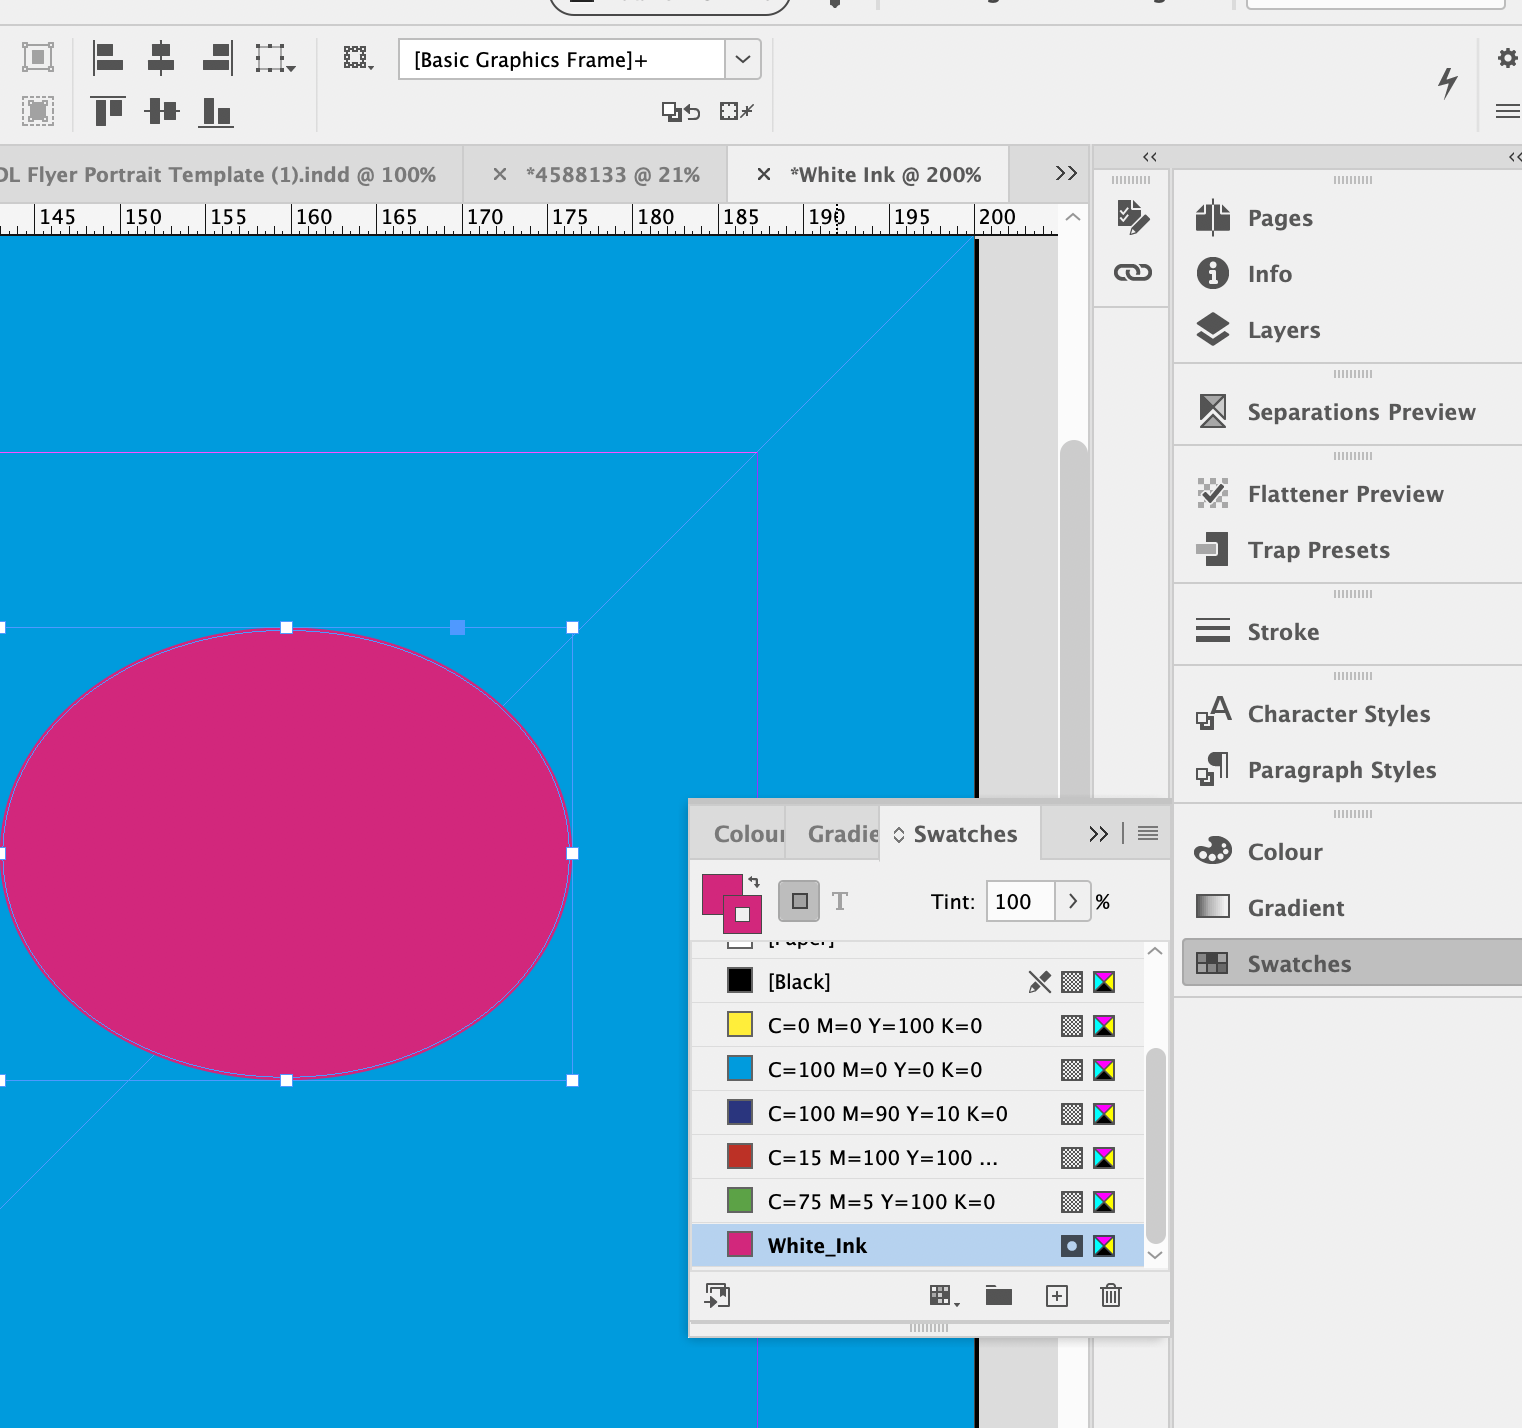
All of our InDesign templates include specific colour swatches for all finishing options or use the instructions below to set up the 'White_Ink' spot colour yourself:
.png)

Place White_Ink elements above your artwork (e.g. on the Finishing Layer or brought to front on the top-most Artwork Layer) using the special White_Ink spot colour swatch. This swatch must remain as a spot colour and must not be adjusted in any way.
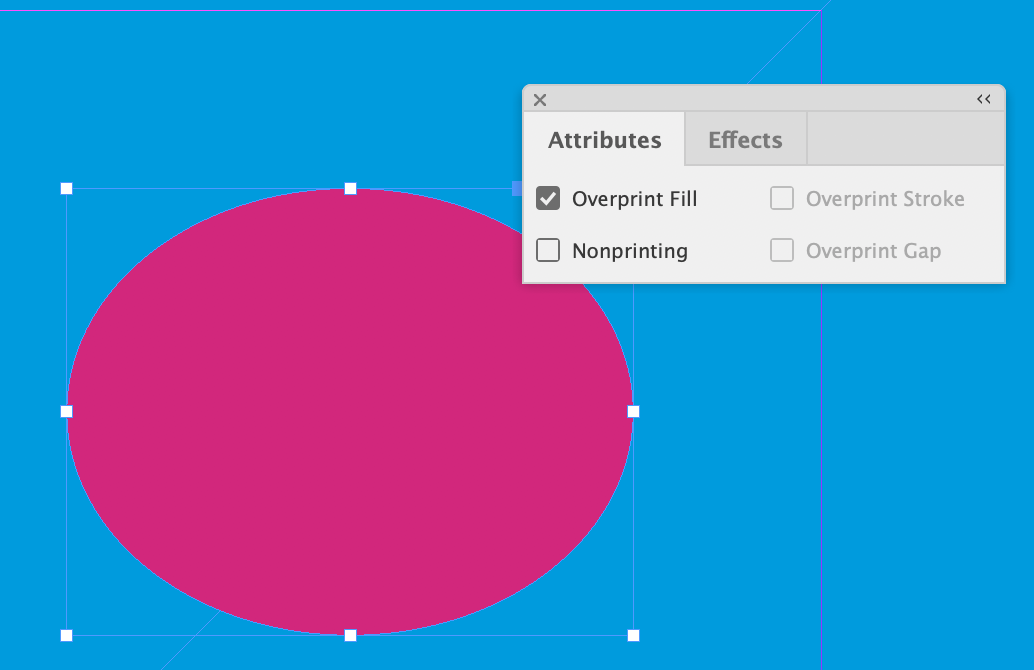
Set the White_Ink elements to Overprint from within your design application.
Jump to contents page of
|
|||