Download an appropriate InDesign Template to start your design from.
The method used for producing the scratch panels is not a high-security process and thus is not recommended for prizes of high value. The best type of prizes are ones that are low value to you, but high perceived value to the end user.
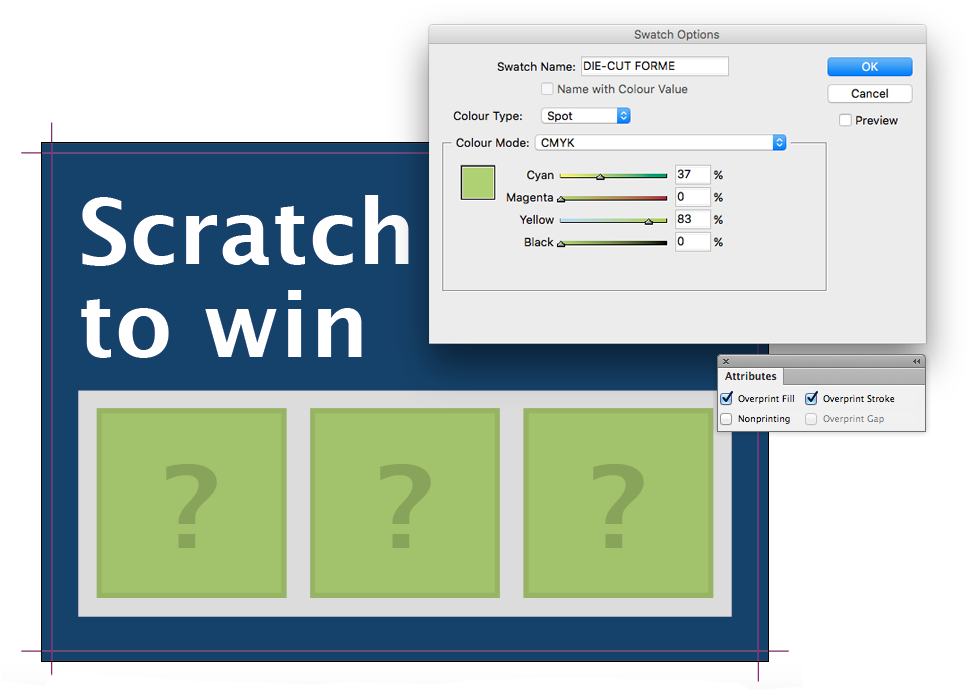
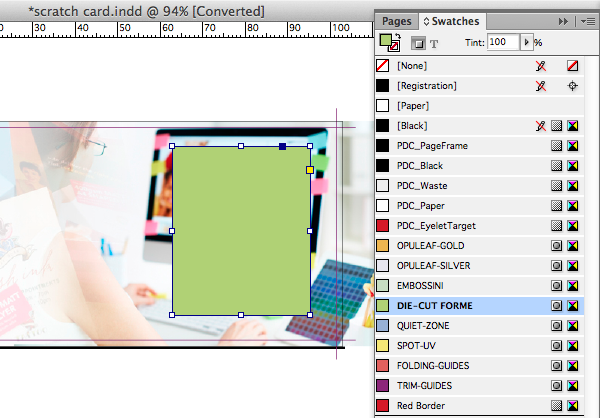
Scratch Cards are available with a latex panel applied to a shape of your choice. We use the DIE-CUT FORME colour swatch in our templates to indicate the scratch off latex area in your artwork.

Each variation may be designed to be a ‘winning’ or ‘losing’ card.
For Scratch Cards with multiple variations (250 x prize one, 1,000 x prize two), please add one set of the required quantity to the Basket, skip the file upload step, then select the Duplicate icon next to the product title to create additional variations of the same product (you can change the quantity for each item in your Basket before proceeding to checkout).
Text or symbols for the game or prizes under the latex panel should be included on the artwork on the same layer as main artwork for the card.
To avoid the end-customer seeing through the latex, we recommend that the artwork under a scratch panel is set to up as follows:
• The background should be 20% black.
• Graphics should use only tints of black, between 30% and 50%.
• Text should only use a black 50% tint.
WARNING: Any deviation from the above specification may produce unexpected results and your artwork may be visible through the latex.
Make sure your artwork under the scratch panel has suitable contrast – i.e. don’t use 8 pt type in 30% black and expect it to be visible!
The latex panel needs to be supplied as a shape above your artwork filled with the special DIE-CUT FORME spot colour swatch. This swatch must remain as a spot colour and must not be adjusted in any way.

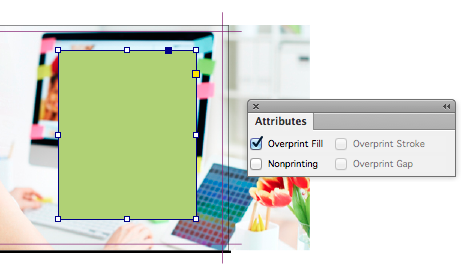
Set the DIE-CUT FORME elements to Overprint from within your design application.

Bleed the DIE-CUT FORME shape at least 1mm beyond the edge of the game panel that is to be behind the latex panel.
The latex is applied using a screen printing process, and registration with print can vary by ±2 mm. This means you should expect the panel element to move around the page by up to ±2 mm.
The latex panel should not be bled off the edge of the artwork, scratch panels are recommended to not encroach into the quiet zone.
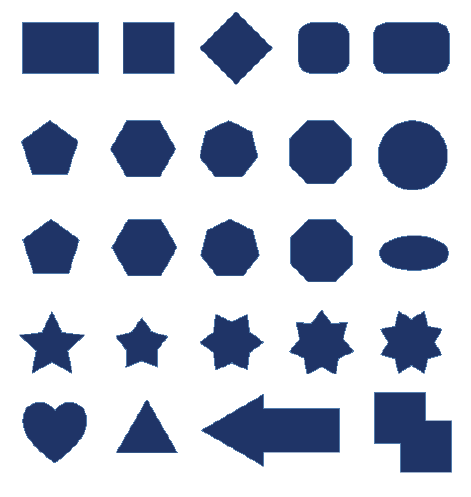
 Keep the panel shape simple
Simple shapes are allowed for the scratch panels. These include squares, rectangles, circles and diamonds.
Avoid:
Avoid bleeding to the edge as chipping and flaking may occur once the job has been guillotined.
Latex must be supplied in vector format.
You may position any number of scratch panels anywhere on the front of the design with a minimum space of 4mm between each.
The smallest shape recommended is 10 mm square. Anything smaller is produced at your risk as the process becomes unpredictable.
The reverse of a Scratch Card can use CMYK but the maximum recommended level is 225%. For large areas of colour over 20mm square we would advise to keep the ink below 150% if possible.
As the reverse is uncoated and highly absorbent uncoated paper, which can be prone to set-off when large blocks of solids are used.
For the best results we recommend avoiding:
In addition, the heat of the lamination process can cause such areas to become tacky and attach themselves to the glossy front of the sheet beneath it in the pile.
Jump to contents page of
|
|||