From enquiry to proposal. Planning through production. Surveys, scheduling and installation. Invoicing and payment. All in one clever system.
Supporting resources for WorksThing systems.
From enquiry to proposal. Planning through production. Surveys, scheduling and installation. Invoicing and payment. All in one clever system.
Supporting resources for WorksThing systems.
Sign in to WorksThing at: https://uk.worksthing.com
From the dashboard, hover over the grey settings button at the top of the page, this will expand, Click on My Account.
This will show you your user details.
On the blue banner you have a number of options
Details - Settings - Teams - Calendars - Availability - Badges
Go to settings and check Allow chat/invites is on.
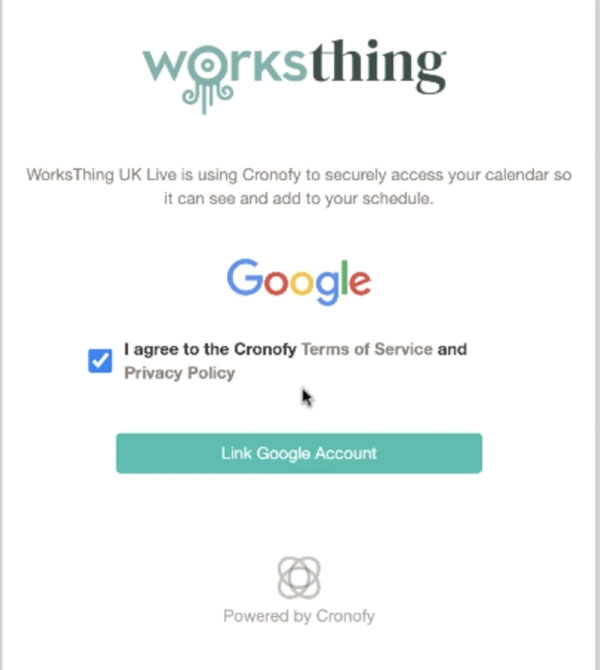
Accept the Terms and Conditions and click Link account.
If you have multiple accounts, it will give you the option to pick which account you would like to set up.
Once you have chosen which account you want to link, this will open your login page for your chosen account. It may ask you to sign in.
Accept access to your account. This gives WorksThing permission to link the calendars.
This can take a few minutes to load.
It will take you back to your user details with an added note of successfully connecting the calendar.
Go to the calendar from the blue banner. Your account will be shown under calendar accounts. Make sure ‘All events in my connected calendar’ is ticked.
Setting your availability for bookings.
Click onto the availability tab.
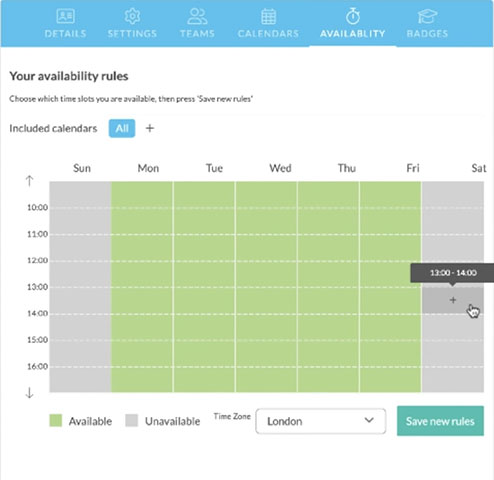
You can alter your availability which will allow people to book within your working hours.
Once you have set your availability, click Save new rules.
Setting your Area Served.
Enter a postcode, and select your chosen area.
You can then choose the distance of how far you’ll travel to a site. Default with show no service. You can change this. Click on the drop down and select the distance.
This will also prevent people outside your service area from booking with you, and will prevent you from being assigned work as a user unless it’s within your area served.
The map will update highlighting your service area.
At the bottom of the page click add a user.
This will take you to a contact form where you can fill the details to create a new user.
Fill all the details in.
For the Access level: This is important.
Employees will go down as a Studio Manager.
Contractors - Installer or Surveyor (Y)
Anyone who does installations on your behalf.
This gives them a slimmed down version of WorksThing. With access to the calendar and to be able to Accept or Decline invitations for installations and surveys.
Ensure Accept chat invites is on
Give them a password.
Press save.
Once they have their log in details they can synchronise their calendars.
Log into WorksThing: https://uk.worksthing.com/
From the dashboard there are a few different ways you can create a client record.
Hover over Create on the banner, it will drop down, click on Contact/Customer.
You will need to fill this in.
Our system is linked to royal mail so you can input a postcode and search for the address.
Check over the details and click Create Contact.
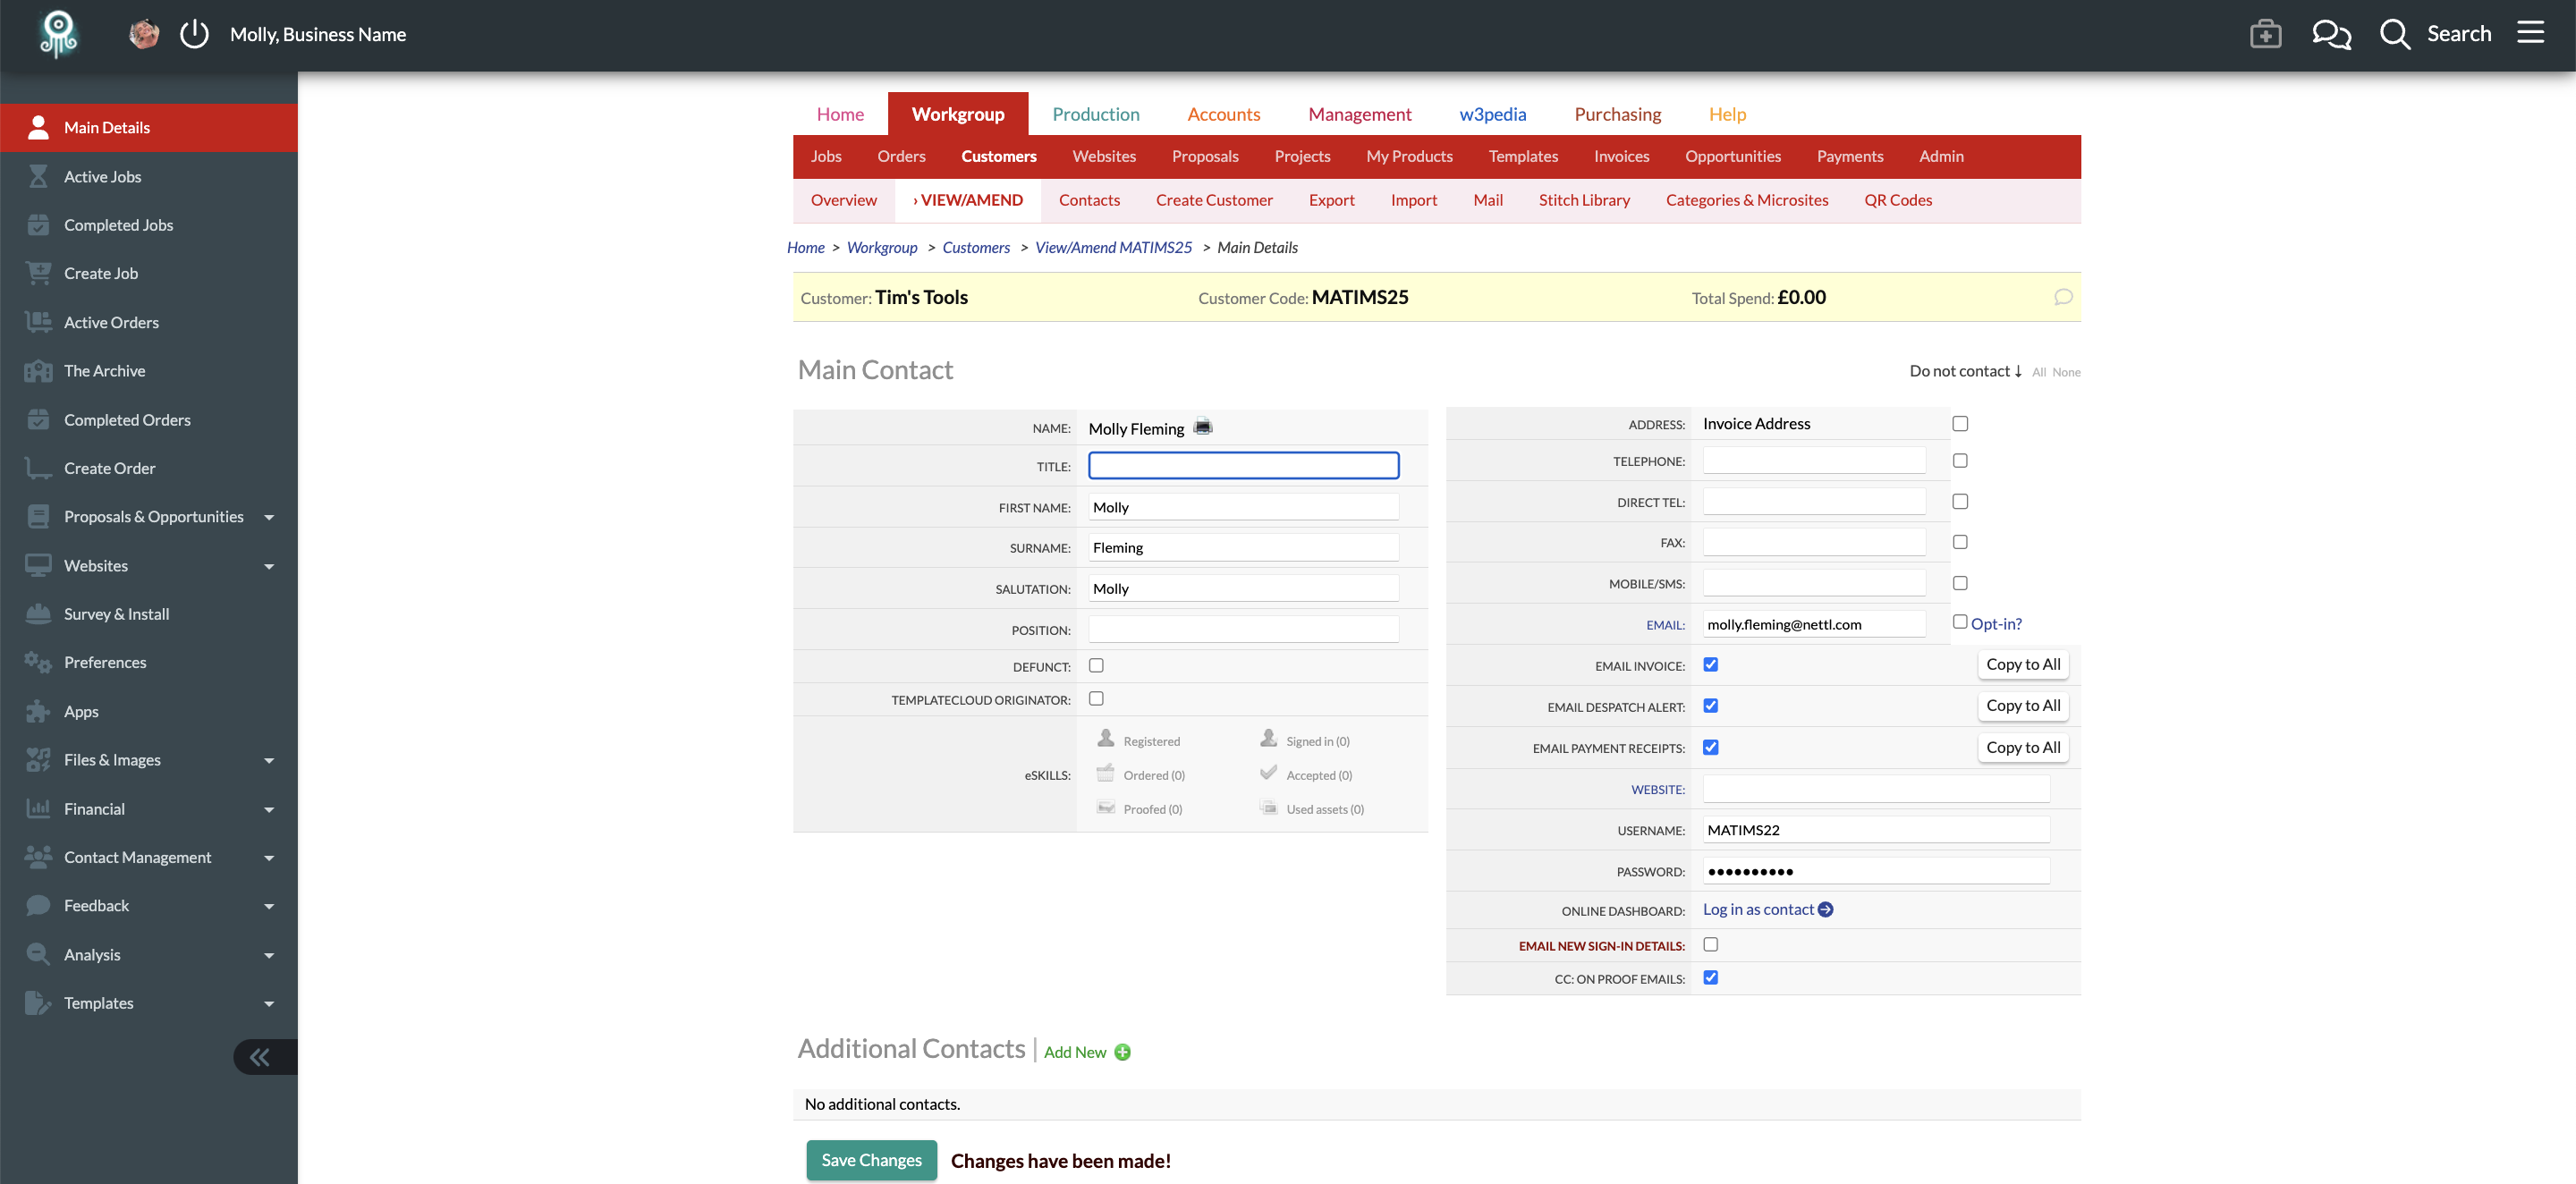
This will take you to the Main Details page for this customer.
You can then add further details at this point such as a telephone number.
Here is where you can add additional addresses for the client.
Click on Add New
This will take you to another contact form. Try to fill in all the relevant information, the more information, the better. Make sure you click Save.
Once filled in and saved . On the left you will see a grey menu, click on Main details at the top, this will take you back to the Main details page. The information you just imputed will then show up.
Starting a Survey:
On the left of the page there is a grey menu with a number of options.
Click on Survey & Install.
This will take you to arrange an installation page.
Choose the address that the installation needs to take place. These are the same addresses added into the system when you create the customer and View/Amend further details.
You can then add notes for this job.
Click, book bundle. It will then take you to an overview of the booking for that particular project bundle.
Then click, book survey.
You can then choose the survey type, a surveyor, how long the survey will take and the travel time. You can then check the availability and confirm all the details. By clicking confirm this sends a notification to the installer. Where they can confirm or decline.
Once the installer has accepted or declined this will then show up on the overview.
If the installer has set their calendar up this job will show up in their linked calendar.
Once you have selected a date and time click confirm.
This will then notify the surveyor, they can then Accept or Decline the booking.
Once accepted it will show up on the booking overview.
You can add the risk assessment from the timeline. See who uploaded it and when.
This follows on from the previous set up tutorial after the job is assigned and accepted.
Surveys can be completed out in the field on the WorksThing app or even from a web browser.
Log into your WorksThing account: https://uk.worksthing.com
On the dashboard hover of the view menu, this will drop down, click on plan.
This will then take you to the Plans, Surveys & installs screen.
Click on Surveys & Installs
Click on the relevant booking you wish to view.
This will take you to an overview of all the bookings.
This will then take you to a new form for the confirmed booking.
You will need to fill in the required information fields.
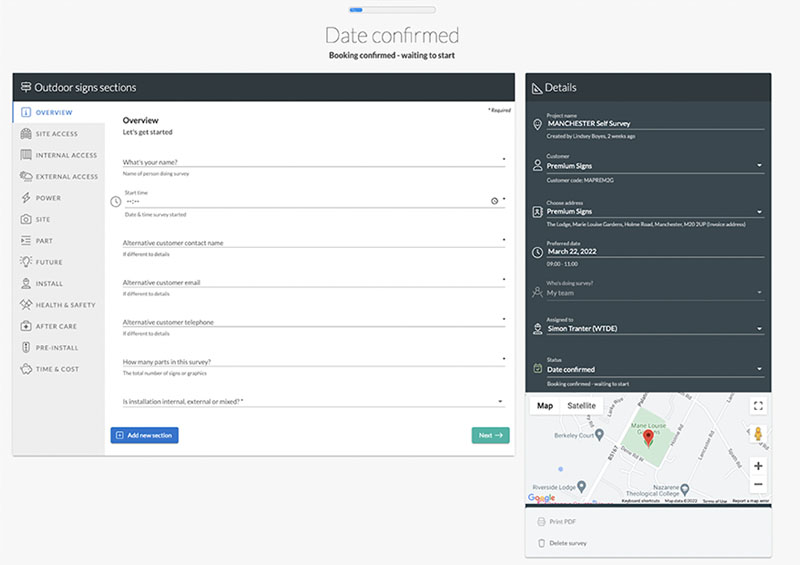
Working down forms on the tabs down the left of the page.
This would then updated the owner of the sign company to say the survey has been done.
To locate your bundle and order that we set up in the previous tutorials.
Log into WorksThing https://uk.worksthing.com/ and you will see the dashboard.
Hover over the View menu and this will drop down some options for you.
Click on Contact/Customer.
This will then take you to the customer search landing page.
Here you can either type into the search field or if you scroll down your recently viewed will show up at the bottom.
Select the customer you would like to bring up.
This will then take you to the main overview for the client.
On the left click on active orders and click on the booking you want.
Select the order you need.
This will show you the order summary.
On the left of the page you will see a few options you can click on. Click on Fulfil & Install.
This will then open up the order with the bundle and can show you how far along the process.
Scroll down the page and click on book install.
Fill in the relevant fields for the installation to book the installer, once you have chosen the date and time click confirm.
That will then sync with the calendar.
Scroll down and click on start install.
Then click on finish install, The system will then mark the install as complete.
You can mark the install complete.
When the install is completed there's a button for "sign & accept"
The installer can give to the client, once open they can sign on the signature pad with their finger.
The two buttons at the bottom report an issue or leave feedback.
Acceptance is shown and is downloadable on the bottom of the timeline.
Log Into WorksThing https://uk.worksthing.com/
You will be taken to the dashboard.
Hover over the view menu and click on Contact/Customer.
From here you can either search for your customer or find them further down the page in the recently viewed section.
Click on the customer you want to view, this will take you to the main details.
On the left of the screen you will see a menu bar, click on Survey & Install.
Click Arrange install
Fill in the relevant fields.Once filled in click Save Bundle
This will then take you to the overview/check list of the installation.
Click Book Install.
Fill in all relevant fields and select the date and time for the installation
You can also add the travel time in.
The surveyor + installer will automatically be added to the chat when they are requested.
This will send a notification to the installer to confirm or decline the installation. You will then be diverted back to the timeline/ overview of the booking. This then shows on the timeline as waiting for the installer to confirm.
If you wanted to upload files and images you can do this in the Arena.
Click share files/images/notes on the right of the page.
The Arena will pop open. With your order in reference.
You can then upload the files, this will then live next to the booking forever so if there are multiple members working on the same project they can see the notes added.
To come out of the arena just click outside it.
When the installer receives the email asking them to confirm or decline it will give a breakdown/overview of the booking.
Regardless of whether they confirm or decline, whoever set up the booking will be notified.
This will take the contractor/installer to booking overview.
Once confirmed the overview will update and an email will be sent along with a new job in the calendar to the installer and the owner or The WorksThing set up.
The risk assessment can be added from the timeline.
You can then view who uploaded the risk assessment and when it was uploaded.
Once the install has started the light next to it will appear green.
When the install is completed there's a button for "sign & accept"
The installer can give to the client, once open they can sign on the signature pad with their finger.
The two buttons at the bottom report an issue or leave feedback.
Acceptance is shown and is downloadable on the bottom of the timeline.
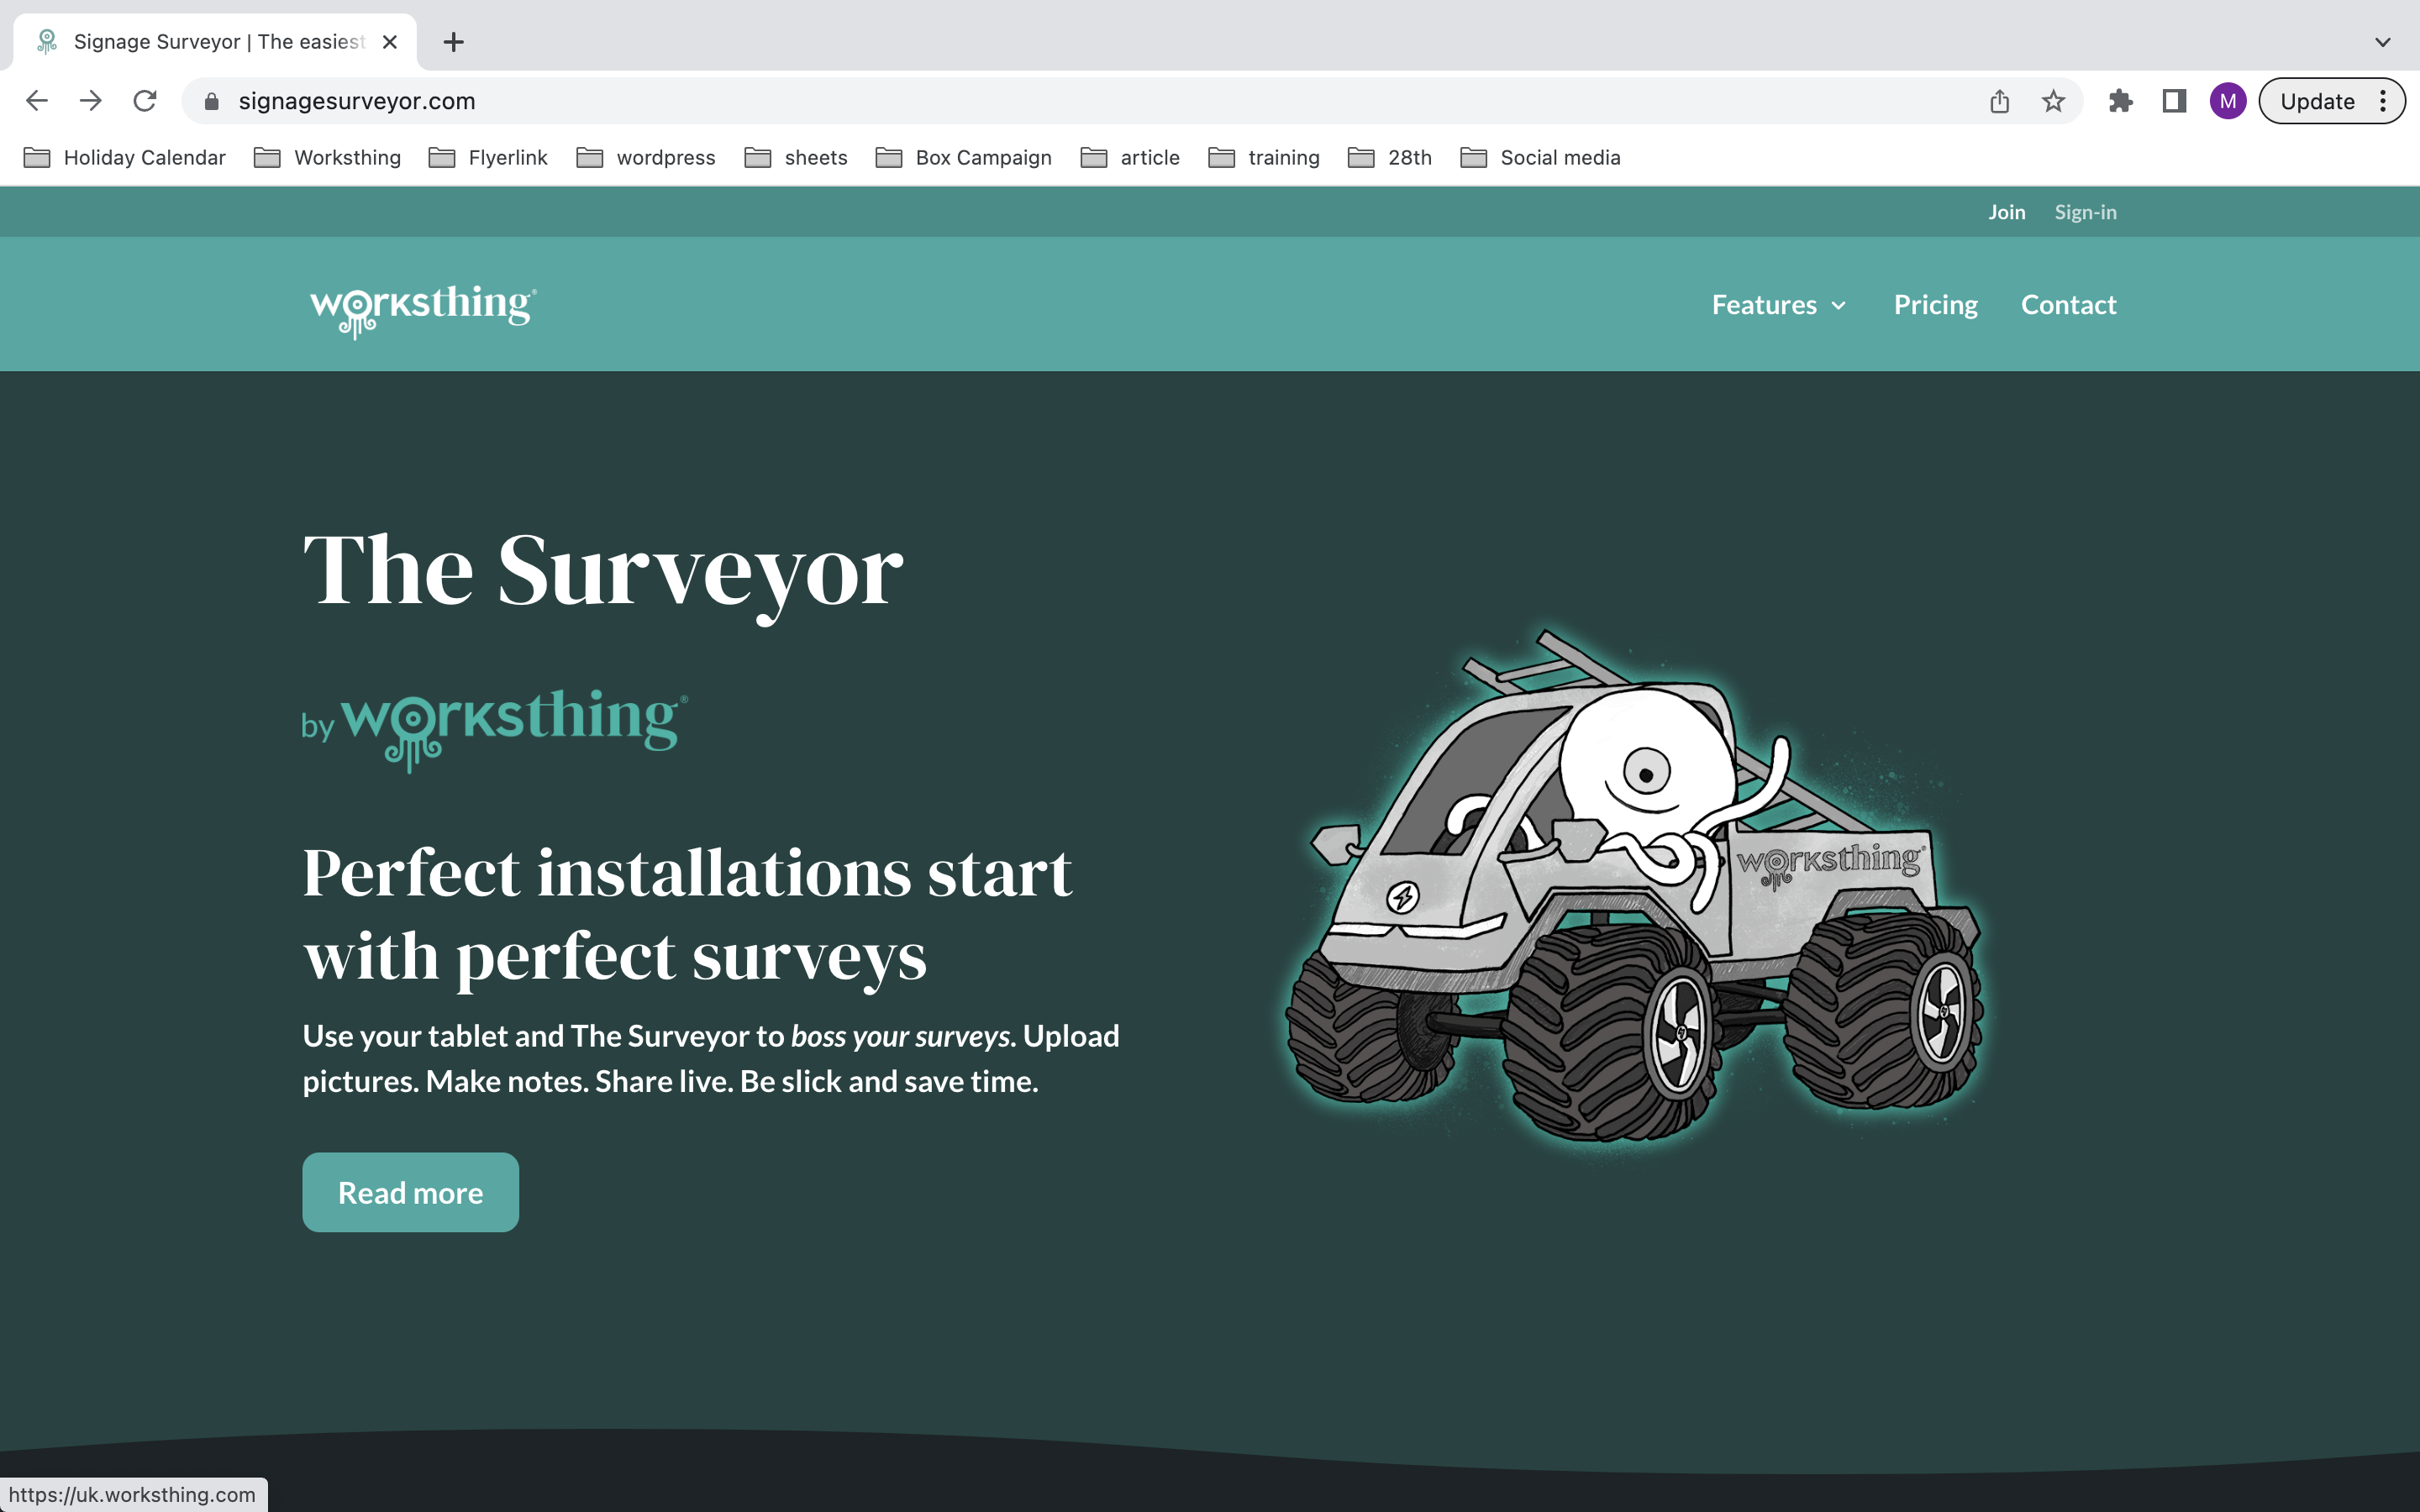
Sign in to The Sign Surveyor by Worksthing: https://www.signagesurveyor.com/
From the dashboard, click on my user account from the tile menus
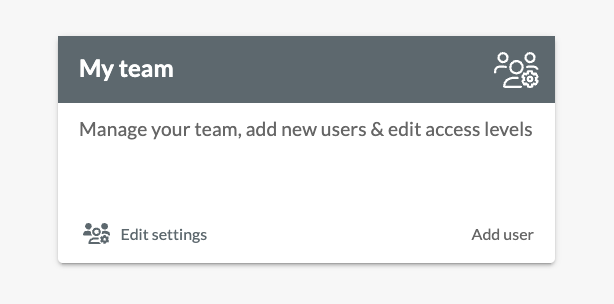
or you can hover over the grey settings button at the top of the page, this will expand, Click on My Account.
This will show you your user details.
On the blue banner you have a number of options
Details - Settings - Teams - Calendars - Availability - Badges
Go to settings and check Allow chat/invites is on.

Accept the Terms and Conditions and click Link account.
If you have multiple accounts, it will give you the option to pick which account you would like to set up.
Once you have chosen which account you want to link, this will open your login page for your chosen account. It may ask you to sign in.
Accept access to your account. This gives WorksThing permission to link the calendars.
This can take a few minutes to load.
It will take you back to your user details with an added note of successfully connecting the calendar.
Go to the calendar from the blue banner. Your account will be shown under calendar accounts. Make sure ‘All events in my connected calendar’ is ticked.
Setting your availability for bookings.
Click onto the availability tab.

You can alter your availability which will allow people to book within your working hours.
Once you have set your availability, click Save new rules.
Setting your Area Served.
Enter a postcode, and select your chosen area.
You can then choose the distance of how far you’ll travel to a site. Default with show no service. You can change this. Click on the drop down and select the distance.
This will also prevent people outside your service area from booking with you, and will prevent you from being assigned work as a user unless it’s within your area served.
The map will update highlighting your service area.
At the bottom of the page click add a user.
This will take you to a contact form where you can fill the details to create a new user.
Fill all the details in.
For the Access level: This is important.
Employees will go down as a Studio Manager.
Contractors - Installer or Surveyor (Y)
Anyone who does installations on your behalf.
This gives them a slimmed down version of WorksThing. With access to the calendar and to be able to Accept or Decline invitations for installations and surveys.
Ensure Accept chat invites is on
Give them a password.
Press save.
Once they have their log in details they can synchronise their calendars.
Log into The signage surveyor by WorksThing: https://www.signagesurveyor.com/
From the dashboard, there are a few different ways you can create a client record.
Hover over Create on the banner, it will drop down, click on Contact/Customer.
You can also access this from the Home section - you will find a selection of tiles. Click on the Blue Customers Tile.
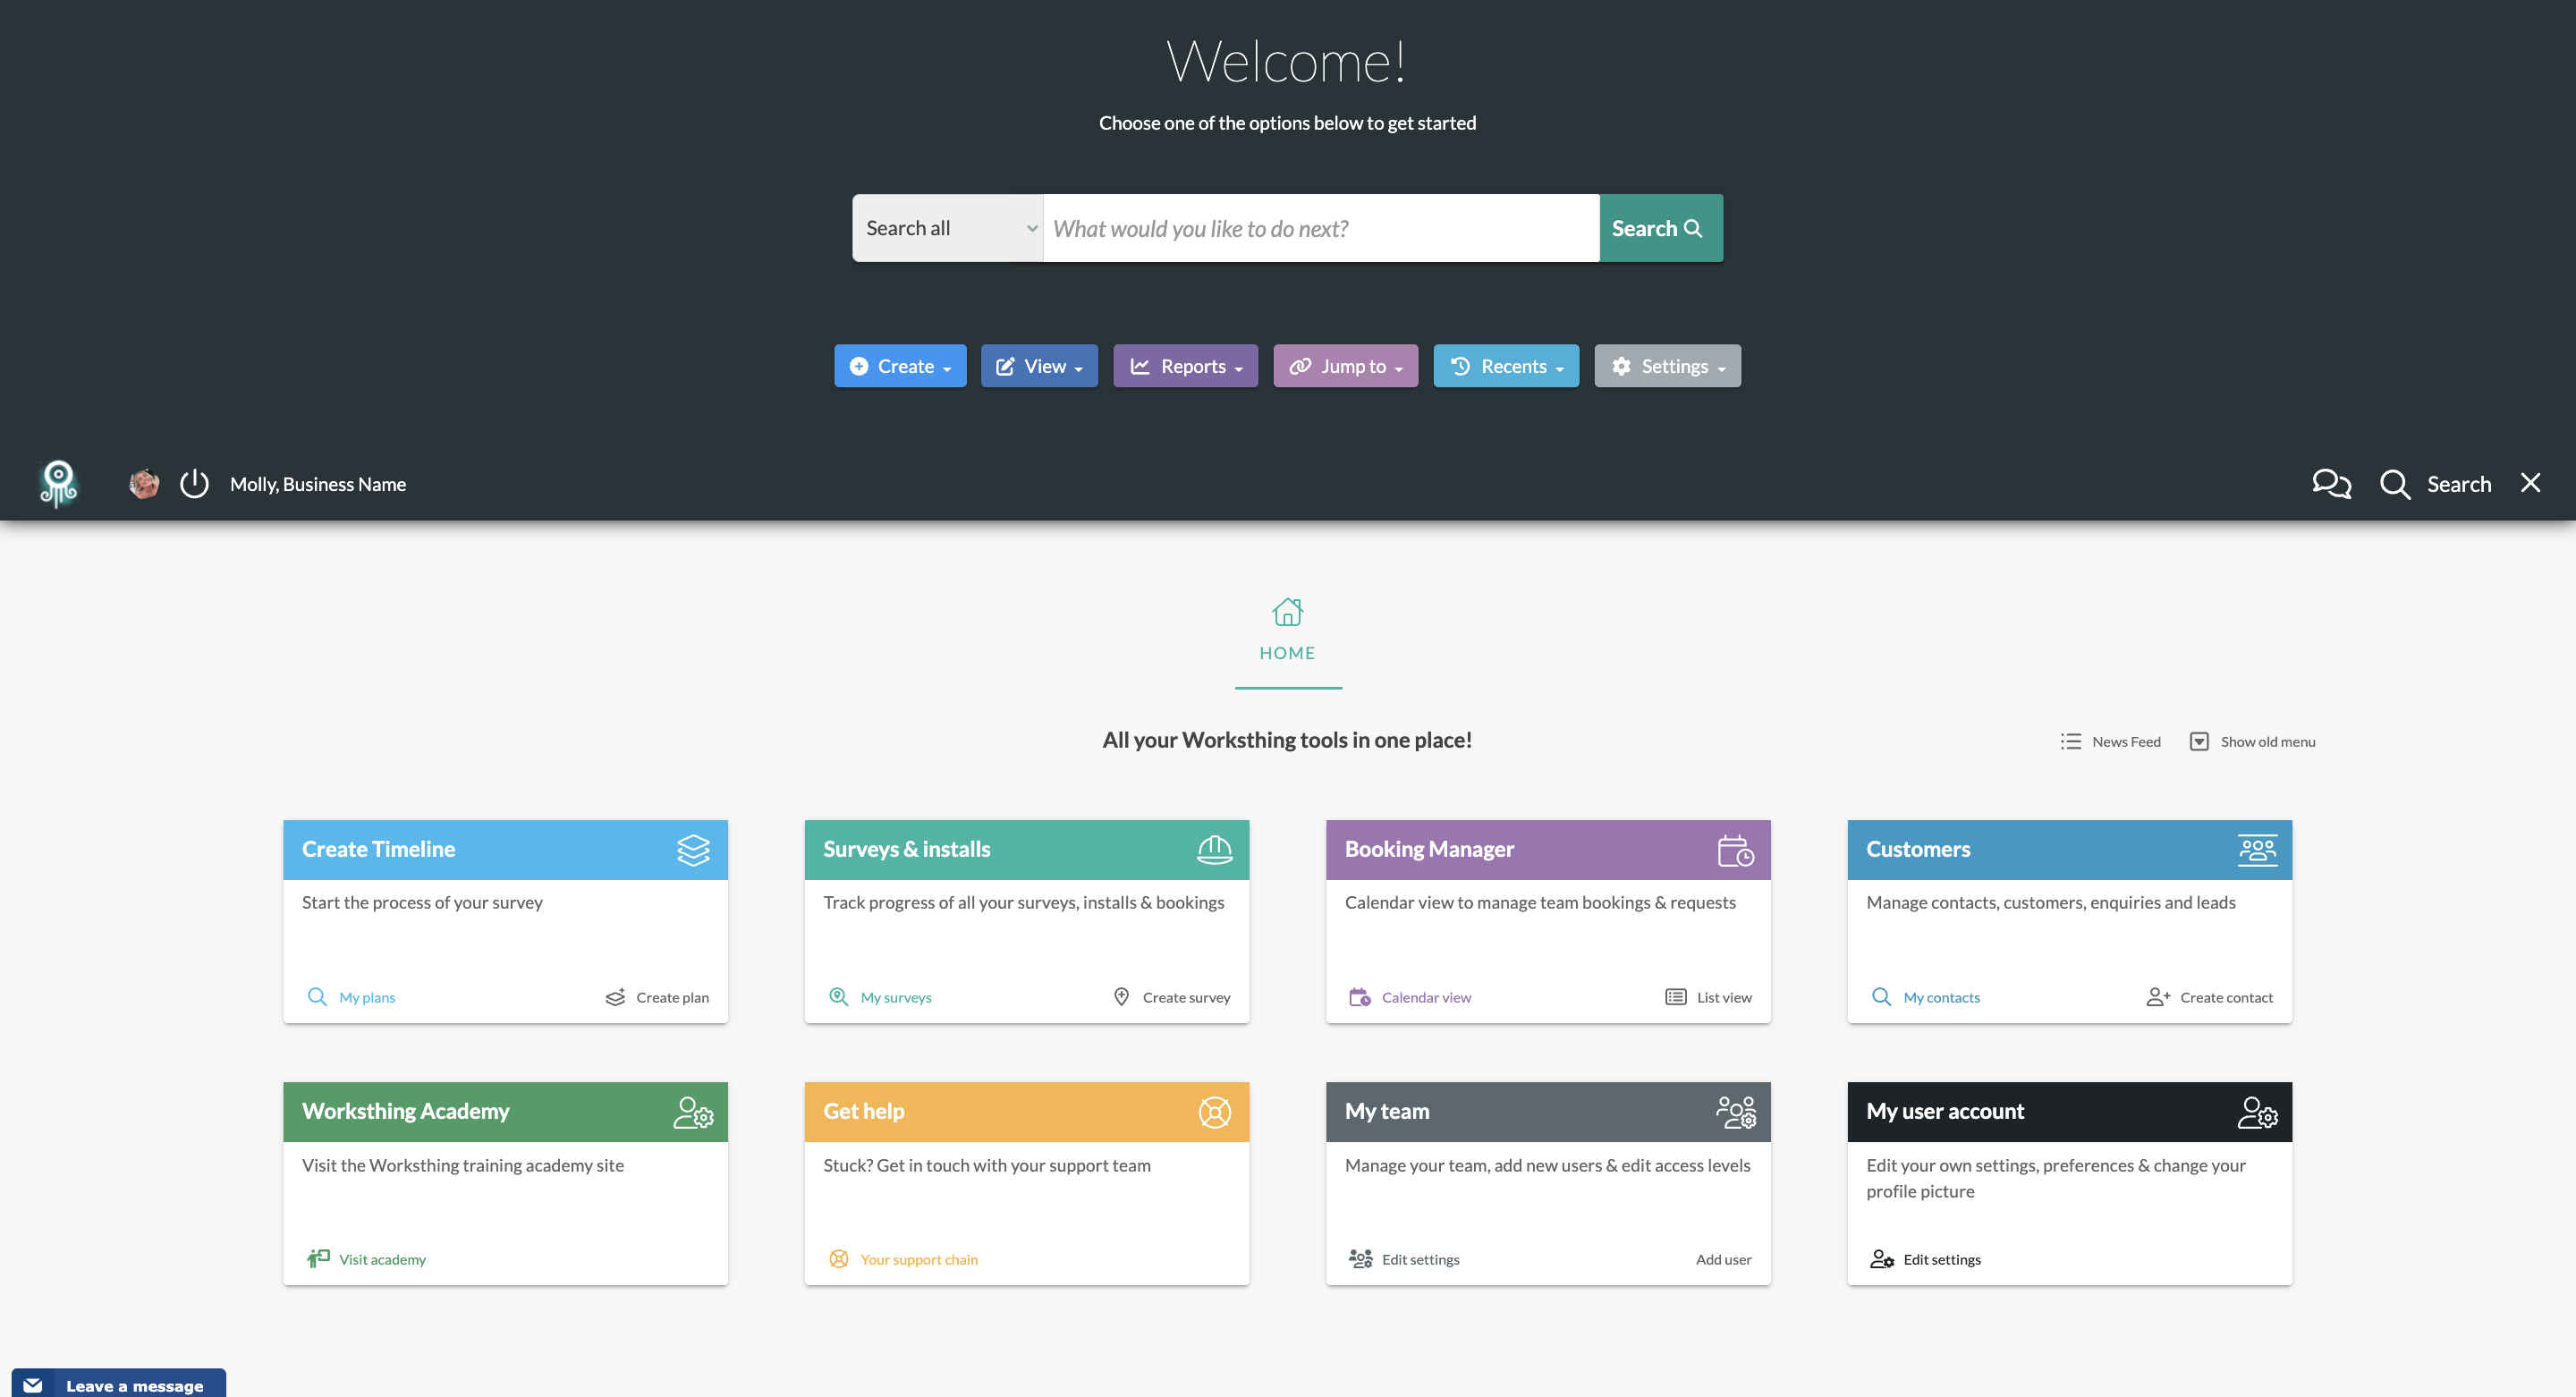
You will need to fill this in.
Our system is linked to royal mail so you can input a postcode and search for the address.
Check over the details and click Create Contact.
This will take you to the Main Details page for this customer.
You can then add further details at this point such as a telephone number.
Here is where you can add additional addresses for the client.
Click on Add New
This will take you to another contact form. Try to fill in all the relevant information, the more information, the better. Make sure you click Save.
Once filled in and saved . On the left you will see a grey menu, click on Main details at the top, this will take you back to the Main details page. The information you just imputed will then show up.
From the WorksThing Dashboard, you can type in the search bar - Create Timeline and press enter.
or under the Home section, you can click the Blue Create Timeline Tile.

This takes you to the Site Timeline page.
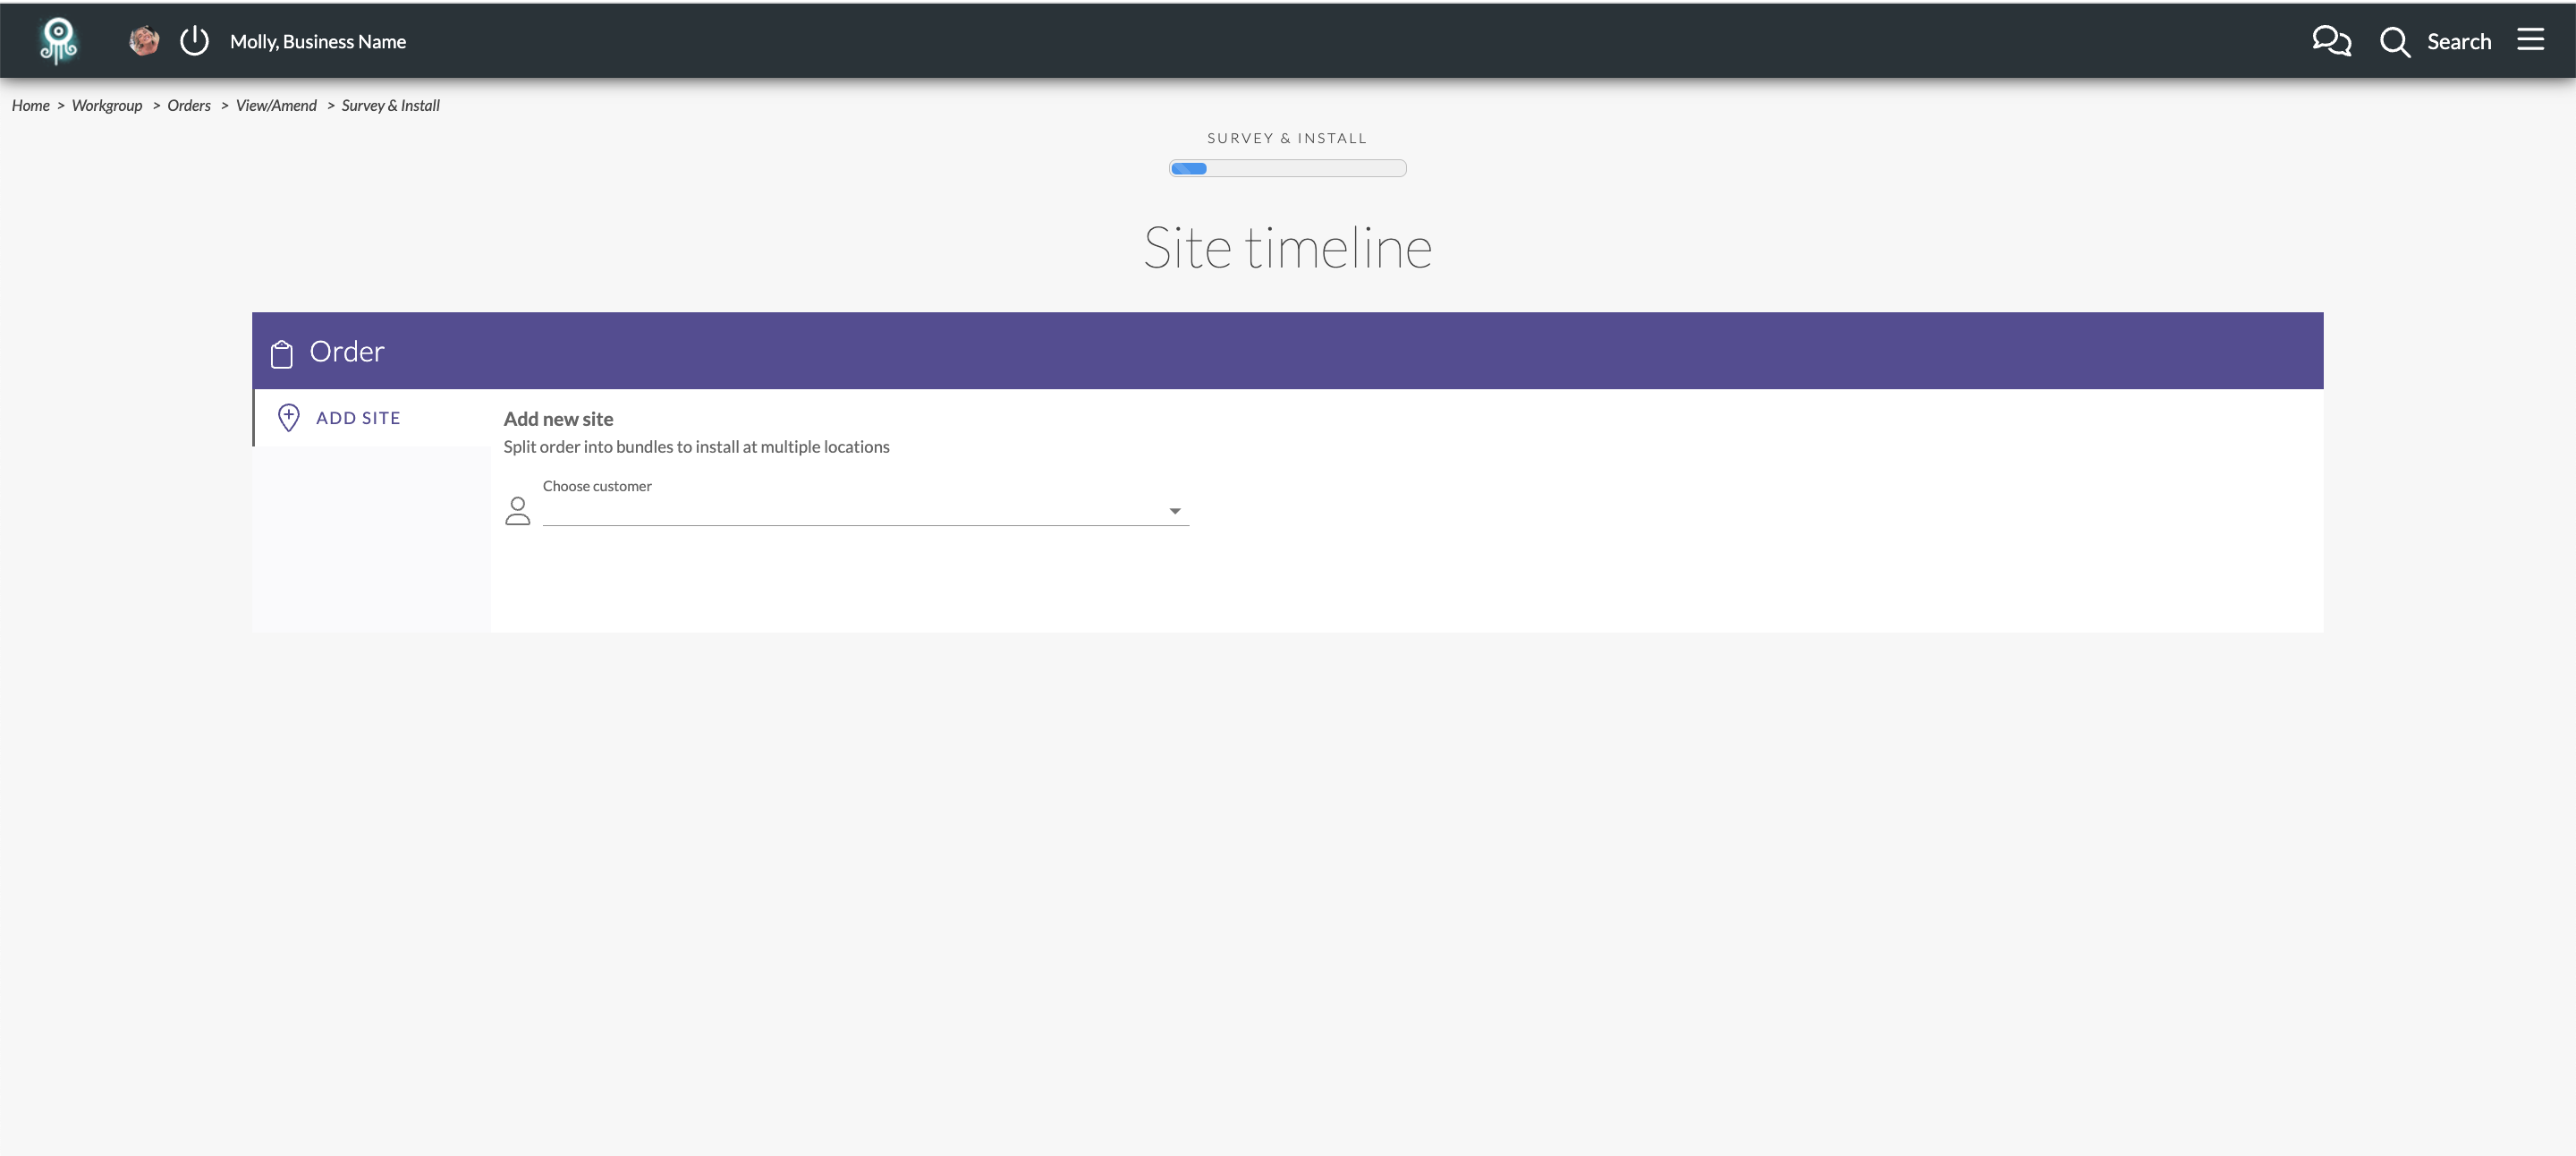 From here you can add the customer and then it will ask you for their address.
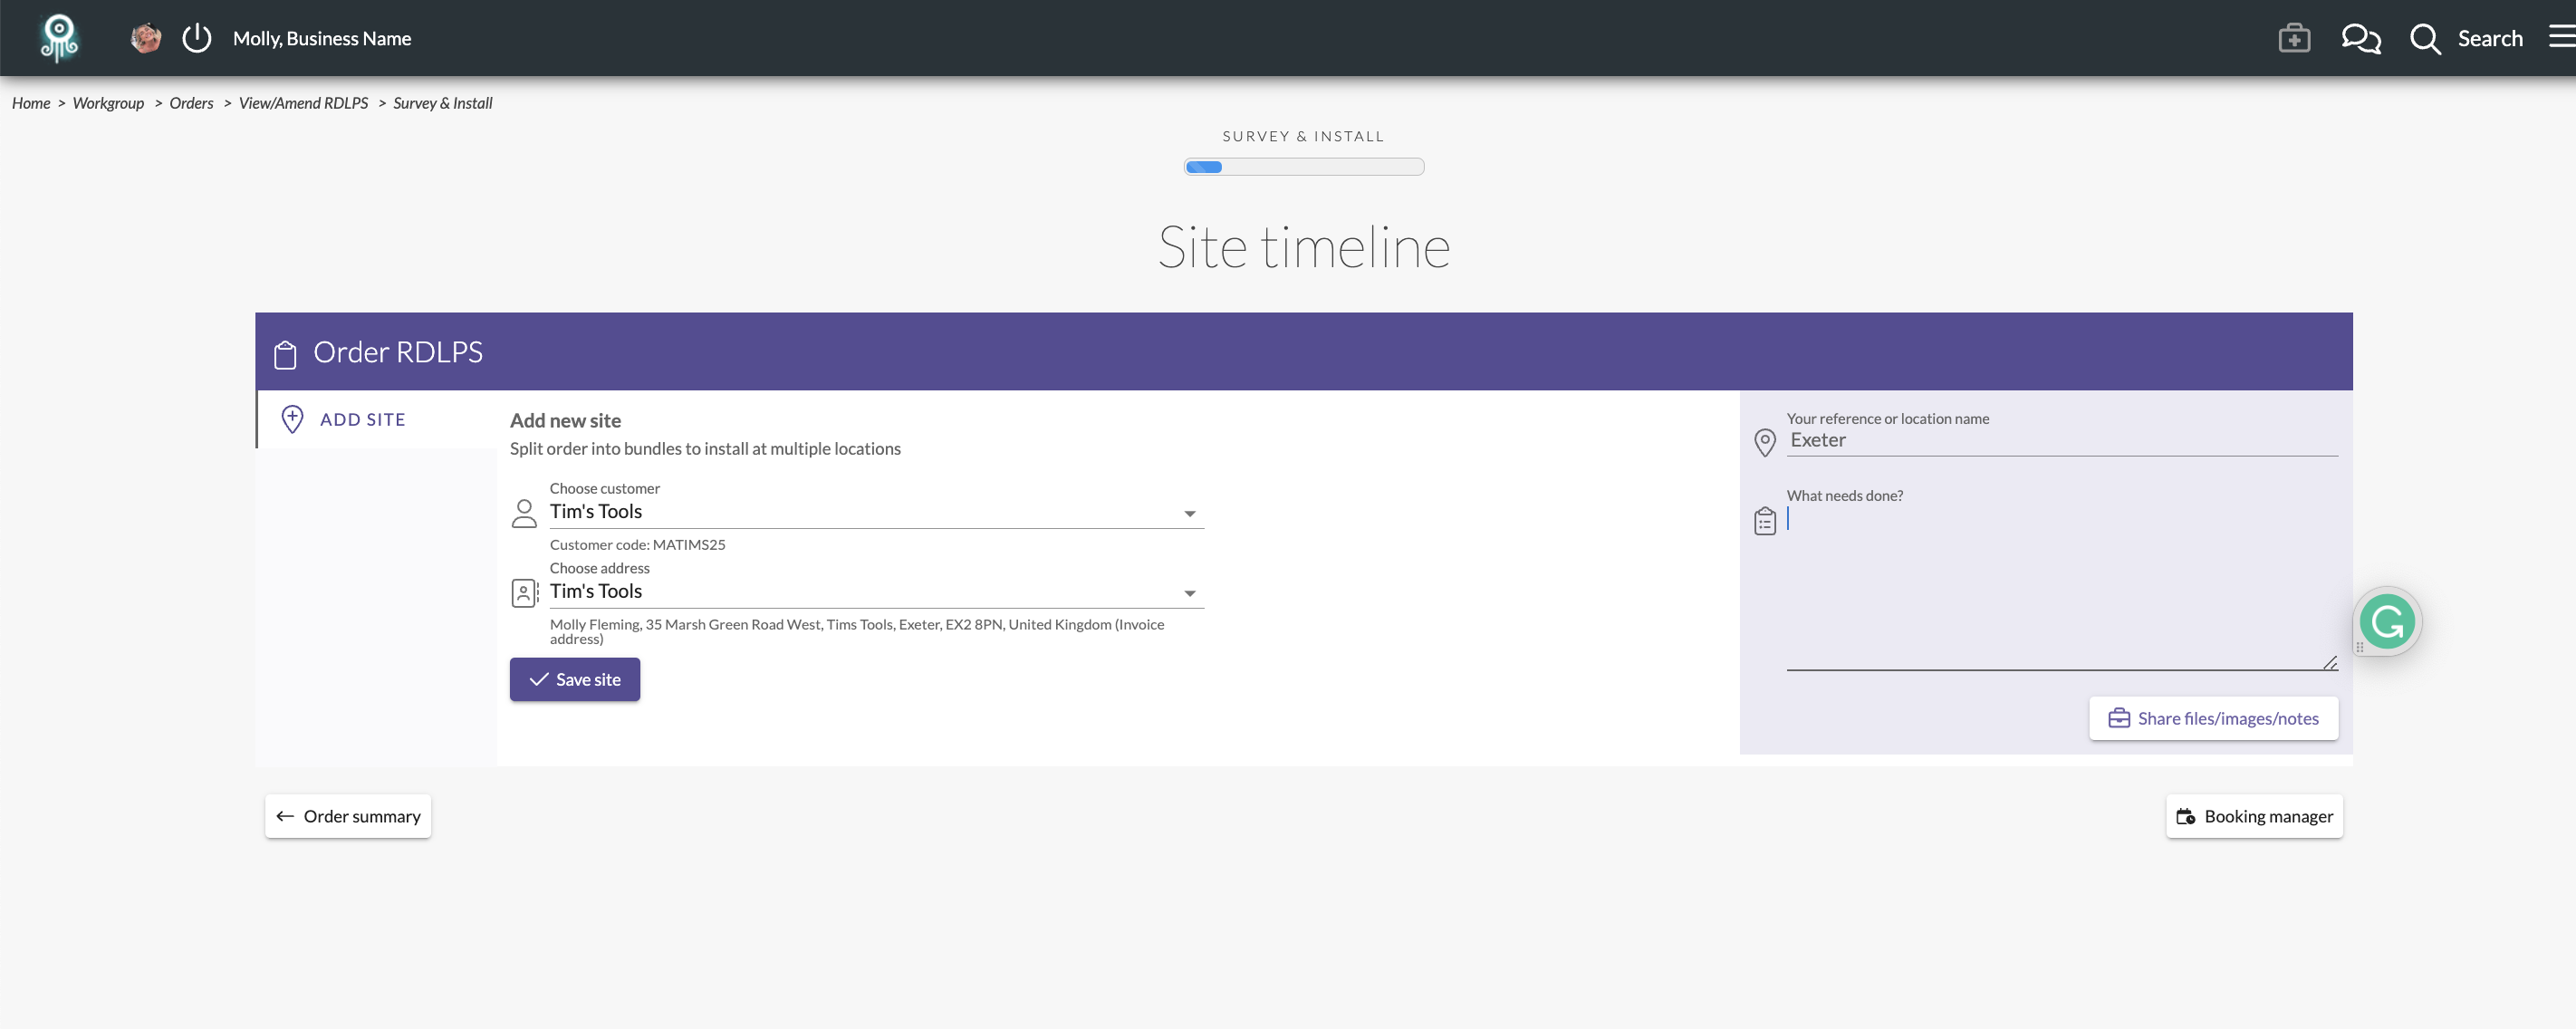 You can also add a reference or location name along with any notes you may have for this order.
Click save site.
 This will kickstart a timeline for this order. on the left you can also add additional sites if there are multiple locations on a job.
There are multiple great tools for you to use on the timeline such as uploading a risk assessment and booking both the survey and install. You can add notes and images to this order which will be stored for later viewing.
From this screen you can also view the booking manager to where your teams availability and bookings are found.

There are a few ways you can start a survey.
This will take you to arrange an installation page.
Choose the address that the installation needs to take place. These are the same addresses added into the system when you create the customer and View/Amend further details.
You can then add notes for this job.
Click, book bundle. It will then take you to an overview of the booking for that particular project bundle.
Then click, book survey.
You can then choose the survey type, a surveyor, how long the survey will take and the travel time. You can then check the availability and confirm all the details. By clicking confirm this sends a notification to the installer. Where they can confirm or decline.
Once the installer has accepted or declined this will then show up on the overview.
If the installer has set their calendar up this job will show up in their linked calendar.
Once you have selected a date and time click confirm.
This will then notify the surveyor, they can then Accept or Decline the booking.
Once accepted it will show up on the booking overview.
You can add the risk assessment from the timeline. See who uploaded it and when.
From the Dashboard - you can click Surveys & Installs

Log Into WorksThing https://www.signagesurveyor.com/
You will be taken to the dashboard.
Hover over the view menu and click on Contact/Customer.
From here you can either search for your customer or find them further down the page in the recently viewed section.
Click on the customer you want to view, this will take you to the main details.
On the left of the screen you will see a menu bar, click on Survey & Install.
Click Arrange install
Fill in the relevant fields.Once filled in click Save Bundle
This will then take you to the overview/check list of the installation.
Click Book Install.
Fill in all relevant fields and select the date and time for the installation
You can also add the travel time in.
The surveyor + installer will automatically be added to the chat when they are requested.
This will send a notification to the installer to confirm or decline the installation. You will then be diverted back to the timeline/ overview of the booking. This then shows on the timeline as waiting for the installer to confirm.
If you wanted to upload files and images you can do this in the Arena.
Click share files/images/notes on the right of the page.
The Arena will pop open. With your order in reference.
You can then upload the files, this will then live next to the booking forever so if there are multiple members working on the same project they can see the notes added.
To come out of the arena just click outside it.
When the installer receives the email asking them to confirm or decline it will give a breakdown/overview of the booking.
Regardless of whether they confirm or decline, whoever set up the booking will be notified.
This will take the contractor/installer to booking overview.
Once confirmed the overview will update and an email will be sent along with a new job in the calendar to the installer and the owner or The WorksThing set up.
The risk assessment can be added from the timeline.
You can then view who uploaded the risk assessment and when it was uploaded.
Once the install has started the light next to it will appear green.
When the install is completed there's a button for "sign & accept"
The installer can give to the client, once open they can sign on the signature pad with their finger.
The two buttons at the bottom report an issue or leave feedback.
Acceptance is shown and is downloadable on the bottom of the timeline.